1.12.2 Documentation
Click here for main home page.
Rockets
Up Up and Away! The rockets are one of the coolest parts of the mod. But with great coolness comes a little work. This is not like other space mods where you plop down a rocket, throw in some fuel and blast off. These rockets have to be carefully built, fueled and programmed with a destination. But these aren't just transport vehicles, these rockets have other jobs like satellite deployment, cargo hauling and mining missions.
Step 1: Build the Chemical Reactor and Electrolyser
While you are carefully building and planning your Space Force Air Base, these machines can be creating your rocket fuel so its ready when you are ready to launch. The electrolyser accepts water through its fluid input hatch and splits it into oxygen and hydrogen. Oxygen will fill one of the machine's fluid output hatches and hydrogen the other. These liquids are pumped into the chemical reactor to produce rocket fuel or pumped directly to a rocket's bipropellant tanks.
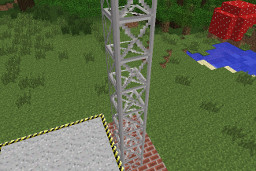
Step 2: Build the Launch Pad
Rockets are built and launched from a launch pad. A good starting launch pad is a 5x5 square of launch pad blocks, 25 total. In addition to the launch pad, you will need structure tower blocks at the edge of the launch pad and extending up to a height of one block higher than your rocket, for safe measures.
Step 3: Build the Rocket
The most basic requirements for a rocket are the engine, fuel tanks, guidance computer and a payload. Payloads are what the rocket is carrying which can be either a person, cargo, satellite or space station modules. Payloads are described more below. Any other block can be used to complete the rocket build and you have complete creativity on how your rocket looks. The number of engines and fuel tanks is dependant on the weight of the blocks you've chosen. Engines provide thrust, and each rocket needs enough thrust to get your rocket through the atmosphere. As the number of engines increase so does the number of fuel tanks required. The rocket needs enough fuel to get to your destination and back. You must find a balance between mass, thrust and fuel capacity to launch a successful rocket.
Step 4: Assemble the Rocket
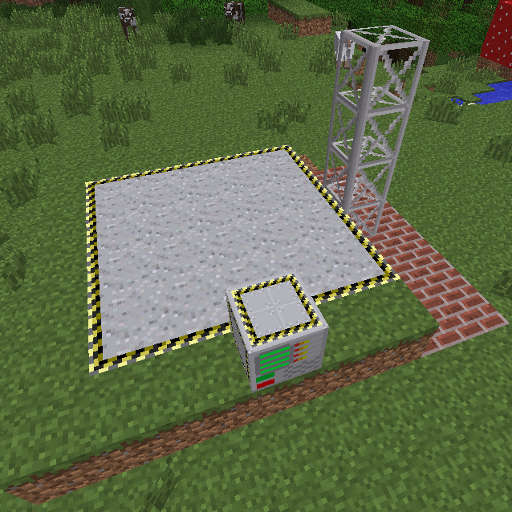
Right now, your rocket is just a bunch of blocks on a launch pad. To assemble those into a rocket, you will need the Rocket Assembling Machine. This block will need to be placed on the edge of the launch pad and one block higher. Once powered, you can interact with the assembling machine to first scan the rocket. This will check that the rockets has all required blocks and will also calculate the mass, thrust and fuel ratios. The results of the scan will display on the GUI of the assembling machine. When you are "Clear for liftoff!", press build to assemble your rocket.
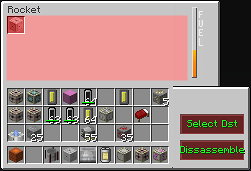
Step 5: Interact with the Rocket
Once your rocket is assembled, you can right click to interact with it. In top left of the GUI you can see all the storage items loaded on the rocket including chests*, satellite bays and the guidance computer. Clicking on any of these icons will bring up that block's GUI and you can interact with it. On the right is the fuel gauge. On the bottom right are two very important buttons. The "Select DST" button is for flight and brings up the map of the solar system allowing you to choose a possible destination for the rocket. You will need more preparation before you can take off, so don't get trigger happy yet. The "Disassemble" button allows you to disassemble your rocket back into just a bunch of blocks.
Step 6: Craft a Linker
There are a number of infrastructure blocks which help to monitor and maintain assembled rockets. The Linker is an essential tool which allows you to link an infrastructure block, like the fueling station in the next step, rocket monitoring station or a docking pad. To link, shift-right click on a infrastructure block then shift-right click on the assembled rocket.
Step 7: Fuel the Rocket
By now, you should have a nice supply of rocket fuel, or if you want to use bipropellant engines, a good supply of hydrogen and oxygen. To get the fuel into the assembled rocket, you need a Fueling Station. Craft and place the fueling station within 5 blocks of the assembled rocket and supply it with power and fluids. If you are using bipropellant, its best to use two fueling stations, one for each liquid. The fueling station will accept buckets of fluid, or fluid piped in from other mods. Use the linker to link the fueling station to the rocket and remember to select the fueling station first. Interact with the rocket and you should see the fuel gauge rising.
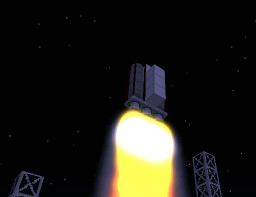
Step 8: Launch the Rocket - Manned
It is almost time to launch. If you haven't yet, craft a Suit Workstation and make a space suit. Be sure to charge it with oxygen using the Gas Charge Pad and pumping oxygen to it. Next you need to install a seat in your rocket. A seat is needed when the payload is a player. The seat needs to be installed during the build phase prior to assembly so it becomes part of the rocket multi-block. You will also need a Planet ID Chip. With a seat installed, a planet chip in your inventory and a space suit on, right-click your fully fueled and assembled rocket. Instead of interacting with the rocket, you will sit in it. To bring up the rocket GUI, press 'C' by default. (check your keybindings). Click on the guidance computer and put your planet ID chip in the slot. Press escape and 'C' again to get into the rocket GUI, then press "Select DST" and select Luna. Read the on-screen instructions, or just press spacebar to take off. Good Luck, Spaceman!
IMPORTANT: Rockets can only travel from a planet to its moon and back OR a space station and a planet and back. They DO NOT travel from planet to planet without a warp core block. See Warp Ship for more details on intergalactic travel.
Step 9: Launch the Rocket - Un-Manned
There are four types of payloads rockets can carry. The first is players, see Step 8. The rest are un-manned rockets and are determined by the blocks used to build the rocket.
- Cargo - install any amount of chests for the rocket to carry items to and from destinations. This is nice for sending items from a planet or moon back to your space station. Requires a planet ID chip or a programmed space station ID chip in the guidance computer. See Loaders and Unloaders and Docking Pad to learn more about automating rockets.
- Satellites - install a satellite bay for the rocket to carry an assembled satellite and deploy it in space. Putting a planet Id chip and selecting your current planet will ensure the rocket's safe return back to the launch pad. If not, call in search and rescue as your rocket could land anywhere within 100 blocks of where it launched. More on this in Satellites guide. A satellite bay can only carry one satellite, however multiple bays can be placed on a single rocket, a wise method to conserve fuel.
- Space Station Modules - install a satellite bay for the rocket to carry an assembled space station module. This module is either deployed in orbit if its a new station or attached to an existing station docking port. Requires a space station ID chip in the guidance computer. See See Space Stations for more details.
- Asteroid Mining Missions - install a drill and chests for the rocket to mine an asteroid and bring back ores and other material. Iridium, by default, can only be obtained through asteroid mining. Requires a programmed asteroid ID chip in the guidance computer. See Asteroid Mining Missions for more details.