1.12.2 Documentation
Click here for main home page.
Asteroid Mining Missions
Mining asteroids is a good way to get specific ore materials. By default, its the only way to get iridium. Asteroids are highly configurable so the raw materials you find and the amount of the materials could vary from pack to pack. The Observatory is your best friend when determining what materials are available in the asteroids.
Step 1: Read Rockets and Satellites
This guide assumes you know how to build and launch rockets and satellites.
Step 2: Craft Satellite Terminals
Launch at least one of each of the data gathering satellites. The satellites gather data rather slowly, so launch the satellites first and let them get started gathering the data you need. Be sure to keep the ID chips, and hopefully you have copies in case you've lost one. Each satellite can be linked to only one terminal, so craft as many terminals as you need, place them and supply them with power. Place the satellite ID chips in the top right corner. You should see information about the satellite and the amount of data it has gathered so far.
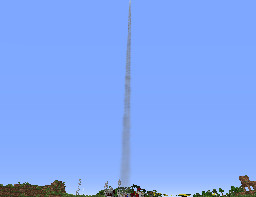
Step 3: Build the Observatory
While your satellites slowly gather data, build the Observatory. The Observatory searches the cosmos and finds asteroids. Once built, be sure to click on the main Observatory block and turn it on. Check it out at night! The Observatory starts with an observable distance of 35 (basic motor and glass), but can be upgraded using motors and a lens instead of glass. Some asteroids can only be found if the observable distance is high enough.
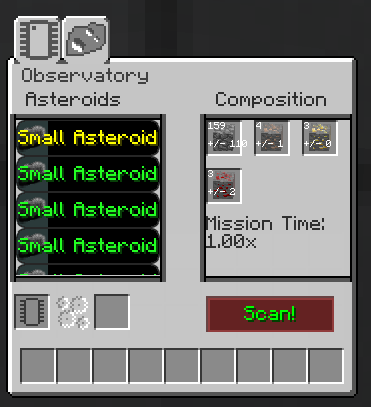
Step 4: Scan for Asteroids
Once you have 100 distance data, download the data into a data chip in the satellite terminal by clicking "Connect" then "Store to Chip". Place that chip in the data bus in the Observatory. On the "Asteroids" tab, click "Scan" and you should see the asteroid list fill with available asteroids. Clicking on an asteroid shows you the composition of the asteroid and the materials you can mine.
Step 5: Add Coordinates to an Asteroid ID Chip
Once you've identified a good asteroid to mine you need to be able to tell your mining rocket where it's at. Place an unprogrammed asteroid chip in the chip slot on the "Asteroid" tab in the Observatory. Select the asteroid on the list and click on the gears. There is no button, but if you hover over the gears it says "Process discovery". Once you click the gears, the asteroid's location will be programmed into the chip. This process can only be done at night, with a clear view of the sky. It can be done at anytime on a space station.
Step 6: Build the Astrobody Data Processor
The Astrobody Data Processor, ABDP, is responsible for programming asteroid ID chips with data. There are three data hatches on the back which can be used to store data downloaded from satellite terminals. Each hatch is assigned one of the three data types. You can either manually download data into data chips and place them in the ABDP or automate the process using Wireless Transceivers.
Step 7: Add Data to an Asteroid ID Chip
It is recommended to wait until you have at least 1000 data for each data type before using an asteroid chip in a mining mission as this will produce the best results. Press the power button next to each data type's research icon you wish to program the chip with, and the available data for that type will be programmed into the chip. This process can take awhile so if you plan on doing extensive mining operations, use multiple ABDP's.
Step 8: Launch and Observe the Mission
After building a rocket outfitted for a mining mission, place the programmed asteroid ID chip in the guidance computer. Launch the rocket and monitor the progress of the mission in the rocket monitoring station.
Step 9: Automating Mining Missions
With the help of Loaders/Unloaders, Guidance Computer Access Hatch and Docking Pads, you can automate mining missions provided you have plenty of programmed asteroid chips. See each block's link to discover more.